They harden by evaporation and shrink as they dry out, so if you're using it to fill a deep hole it can take an age to set. And, when it finally does set, it may crack and end up not completely filling your hole, which is far from ideal This makes them more suitable for filling deep holes. Unlike plaster, the powder left in the box will still be usable when you find another hole to fill months later. Some plasters such as jointing compound are easy to sand when they dry, so you can achieve a fine finish without having to learn difficult plasterers' techniques. Plaster will perish after a few months in storage.
Because of its smooth plastic texture, however, it will stand out like a sore thumb if used to fill holes in the middle of walls. The hardener smells revolting, but is a must if you want to fill anything bigger than a nail head, as it sets hard in minutes and can then be sanded smooth without the usual irritating wait. Don't forget paint can be used as a kind of filler and that small cracks, especially in wood, can often be painted out by simply going over the area with your paint brush a few times. Just double check the paint doesn't start dripping.
Shove scrunched-up newspaper into deep cracks to give the filler a base to attach itself to. With larger holes, build up the filler layer upon layer, leaving each layer to dry before adding the next. To plaster over small holes, first scrape off any old loose plaster with the edge of a scraper or filling knife.
Then use a damp paintbrush to wet the hole. This nifty trick helps the filler bond to the surface. Now squeeze some plaster directly into the hole or on to your filling knife. Paste the filler at right angles to the hole, pressing the plaster firmly into place until it is raised slightly higher than the surface. When dry, sand the surface with medium-grade abrasive paper wrapped around a sanding block.
Tiny holes in plasterboard can be fixed with filler, but for holes bigger than about 12cm you'll need to fit a plasterboard patch first, so that the filler doesn't just fall embarrassingly into the cavity. Start by neatening the edge of the hole with a craft knife. Using an offcut of old plasterboard, cut a patch that you can fit through the hole but is larger than the hole. Before inserting it, drill a small hole through the middle of the plasterboard patch and thread a good length of string through from the back of it.
Tack the string to the back of the patch with a nail. Now apply undercoat filler around the front edges of the patch, and insert it into the hole while holding on to the string, obviously. Pull on the string to bring the patch into place - the filler will make it stick to the wall, obscuring the hole. Now you just need to fill the recess of the patched hole to make it flush with the wall. Holding the string taut, add more undercoat filler to the hole. It's usually a good idea to get a lightweight spackling paste that uses the new primer technology, so that a crack does not develop at the seam between the wall and the patch.
Small cracks between molding and trim can be filled with spackling paste but it is probably easier to use paintable caulk, which is available at any home improvement store. Simply run a bead of caulk along for crack and smooth with a wet finger. Spread a small amount of spackling paste over the hole with your putty knife. Do not put a lot of spackling paste on your knife.
While it depends on the size of the hole, you will usually only need a small bit approximately the size of a pea. Smooth the spackling paste out with your putty knife.
How to Drill Pilot Holes
The goal is to make the transition between the wall and the patch as seamless as possible. Using a damp cloth, wipe off any excess spackling paste that may have gotten on the wall around the hole. If you mess up the smoothness of the patch, feel free to start over with a bit more spackling paste on your putty knife. Allow the spackling paste to dry and then paint the patch, if necessary.
Sometimes a hole is so small and your wall color is light enough that retouching the paint is not necessary. Gather and purchase all the supplies and tools you will need. Get all of your tools and supplies together before you get started. To patch a hole the size of a golf ball, you will need: Apply fiberglass mesh tape or sheetrock tape over the hole. A piece of sheetrock tape soaked in water is cheapest but a patch sticks, flattens better, and is thinner. Holes the size of a golf ball and smaller can also be backed with some tight fitting plug or lid or can simply be taped over.
Any rise caused by the patch can be feathered out with joint compound. Apply joint compound, also called 'mud', over the patch. Use your drywall knife to get it on the wall and smooth it out.
Why Pilot Holes Are Necessary
If you are planning on doing a lot of sheet rock work in the future, it might be a good idea to purchase one. If you only plan on doing this one repair, don't waste the money.

Allow your patch to dry, which should take at least 24 hours. Keep applying thin layers until they are feathered out and smooth. Once dry, sand your patch as needed with a grit sandpaper. Keep going until you cannot feel any seams between the patch and the existing wall. Paint the patch to match the rest of the wall. Make sure that you have gotten all of the dust off the area that you created when you sanded. Make sure to prime the area first. Gather and purchase any materials you will need. All of the items you will need should be available at any big home improvement store.
For a large hole in a sheetrock wall you will need: A piece of sheetrock. Since you may only need a piece of sheetrock that is a few feet square, see if you or a friend has a piece of it lying around, instead of buying a whole sheet. However, most home improvement stores also sell smaller pieces of sheetrock.
Make sure that the sheetrock is the same thickness as the sheetrock on the wall you are repairing. Joint tape Joint compound A set of drywall knives in sizes 6", 8" and 12" Sandpaper A sheetrock saw A razor-knife. Cut out the damaged area of sheetrock. To fix a large hole you will need to cut out a piece of the wall all the way to the center of each stud on either side of the hole. Make sure your cuts are parallel to each other. This will allow you to attach a new piece of sheetrock to the studs. Use a razor-knife to cut down the center of the stud.
Then, make horizontal cuts with a drywall saw. This will allow you to attach your new piece of sheetrock to the stud. Cut a new piece of sheetrock the size of the hole you made. This may take some finessing if the hole is an odd shape. Screw it to the stud on both sides using one screw every six inches or so. The sheetrock saw is better for rough in cuts. Apply a thin layer of joint compound into the seam around the patch.
This layer of joint compound is simply making a bed on which the fiberglass mesh tape can be applied. Apply the sheetrock tape to all sides around the patch. The tape is pressed into the mud completely flat and the excess mud is scraped off with your trowel. Sheetrock tape comes dry but needed to be dunked in water before it is stuck to the wall.
Tape can be of any length and should be overlapped about an inch when put together. Apply mud, or joint compound, in a straight line over the length of tape used. This can be allowed to dry or a second coat can be applied immediately, so as to cover the tape. Allow to dry overnight. Once completely dry, apply a third coat of mud if you think there will be areas where the mud is not smooth. Sand with drywall mesh sandpaper.
Fix-It Friday: Anchors Aweigh! How To Put Anchors Into Walls
Sand until the surface of the joints is smooth. Try to reproduce any wall texture, if necessary. When patching, one of the main problems is matching texture.
- Spooktacular Boobies.
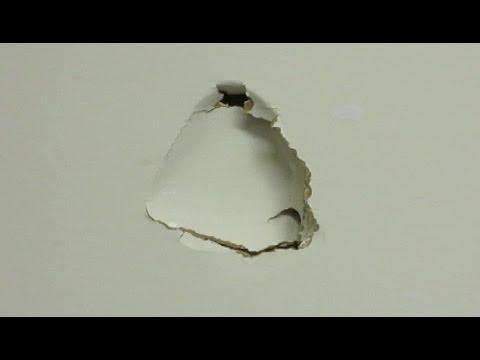
- How to repair a hole in a plaster wall.
- Ukulele Chord Chart For Beginner - Standard Tuning GCEA.
- 4 Ways to Fix a Hole in a Wall - wikiHow.
- Alive to Life: Parting the Clouds 1.
Texture can be hard to match since it is usually machine blown. To texture patches, a stiff stipple brush will often do the trick, by sticking brush in plaster and stippling on finished and dry patch. If necessary, after it sets up a little, trowel over it to flatten high spots. Keep in mind that home improvement stores usually carry three different types of aerosol texture: Prime and then paint the entire wall.
Why You Should Drill Pilot Holes Before Screwing Into Wood
Large areas like sheet rocked whole walls and rooms should be primed really well for toughness and seal. Follow the primer with painting the entire wall. Gather and purchase your materials. Get your supplies together before you begin. To fix a lath and plaster wall you will need: A plaster patching compound A large joint or finishing trowel Sandpaper Coarse grade screws for wood and fine grade screws for metal.